Well, you’ve hopefully posted your first post by now. Perhaps you’ve even gone ahead and explored all the options in the window that we didn’t mention the first time. That’s fine. I’m planning to go over some more of the options as part of today’s lesson.
The joy of being able to post your first couple of posts has doubtless been rudely shattered by poor spelling, typos, incorrect URL, or the ceaseless drive of the writer to rewrite… whatever. How can you edit your posts?
Like most things, there’s more than one way. In fact, there are two easy ways. Let’s start with the easiest way. So login to the blog, and you’ll be taken to the Dashboard. Right at the top left of your dashboard page, next to your blog title, you’ll see the words ‘View Site’. This image should help you.

Click on this to go to the front page (where your first few posts likely are).
When you’re on the front page, you’ll likely see the words ‘edit’ or ‘edit post’, or a pencil (this all depends on the theme you chose). Click the word to take you to the edit screen.

The post will open as in Posting Your First Post, but this time the main area and title area will not be empty.
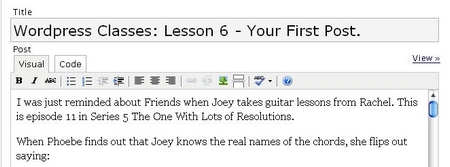
You can go about changing the title and the text as you wish now, don’t forget to save it when you are done, or every so often if you are taking a while to finish the editing work.
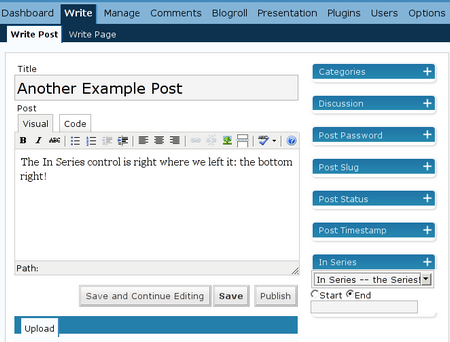
There are additional things you may wish to change as well, but I’ll only mention five things you might want to change. Almost all of the options can be found on the right of your ‘edit screen’.
1. the post slug – if you change the title of your post, since this automatically generates your post-slug (the part of the name that is used as the unique address). You should likely change this. The easiest way is to delete the text in the box, and hit ‘save’, ‘publish’ or whatever.

2. the date – if you decide that you want to publish this another day, you can do one of two things.
a. change the timestamp – simply change the publish date to a future date (like arranging an appointment), check the ‘edit timestamp’ box, then hit ‘save’ or ‘publish’. Once this is done, the system will publish the post automatically at the preset time. In fact, you can schedule a lot of posts way into the future!
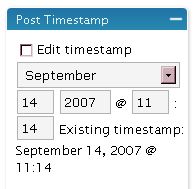
All timestamps are in the 24-hour clock standard. Also, note that the server time may be different from your own time zone.
b. change the post status – You can do this manually, too. Look at the Post Status box on the right, above the previous box. There are typically three conditions: published, draft and private. Let’s not concern ourselves with ‘private’ right now. If you are editing a published post, you can simply click the ‘draft’ button here, and then hit ‘save’. The post will return to ‘unpublished’ status.

3. the categories – You may also wish to change or add categories to your posting from the original one. You can do this in the category box on the top right.
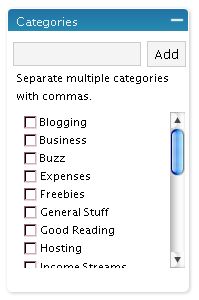
You can simply check the category you want if it is already there or type the name of a category in the top box, and click ‘add’. It will be autochecked when the box refreshes in a few seconds.
4. Comments and Pings – When you publish a post on your blog, there are two ways for people to interact with your publication. We’ll just look at comments, right now. In fact, the comments can be managed in the Options page, and individual comments can also be managed in the ‘Comments’ section. We’ll come back to this. If you are uncomfortable with commenting when you start out, you don’t need to worry about this and can simply uncheck any comments and pings at all, until you feel more confident. The comments and pings facilities in blogs are part of what make the blog much more interactive, communal, and so very web 2.0.

If you haven’t altered any of the settings for comments and pings, it’s likely that in a new blog, both of these boxes are checked. You can leave them as they are, or uncheck them (one or both).
In general, whatever you do when you edit your post, you will need to remember to hit ‘save’ or ‘save and continue’ or, in some cases, ‘publish’ to store the options and changes you made.
BTW, I did say there are two ways to manage your posts. We’ll also come back to that in a future post. Don’t worry, and DON’T be afraid to explore on your own!

