With the recent and much anticipated release of WordPress 2.7, I was reluctant to upgrade some of my blogs because of past foibles, bugs and unexpected incompatibilities with plugins. So when I read that 2.7 was released, I was initially reluctant to upgrade ANY of my blogs. So I started with a couple of them, and updated, tested things out, and moved on. Ordinarily, I would have waited until 2.7.1 was released as a bug fix for some of the issues that area always present in a full release of Wordpress.
Overall, I’ve been very impressed with Wordpress 2.7, in the few days that I have used it, and I’m a little frustrated that some of the hosting companies I work with haven’t updated the software on CPanel yet. Of course, Dreamhost jumped in pretty early, and that’s why I was happy to try it out. I’d say that there are five basic reasons I like this version of Wordpress more than any previous release.
1. A Simplified Dashboard: You can eliminate clutter!
The dashboard has long been a bone of contention for me, because of the tendency of Wordpress to want to flaunt its gimmicks, updates and features to all and sundry. In this version, though, users get to turn off the feeds, through the screen options at the top right. Simply uncheck the things you don’t want. Voila!
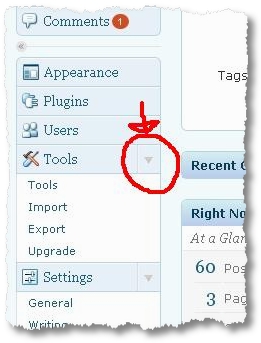
Additional features that are helpful are the little downward arrow that occurs at the top of most boxes, in the top right corner of each box. Simply clicking on that arrow or area closes or opens the dialog box in an obvious fashion. You’ll see the downward pointing arrow next to tools (see highlighted area). It works simply in a toggle fashion. These toggle switches are all over the admin area. To find them, just hover over the task bar for each item on the right hand sided.
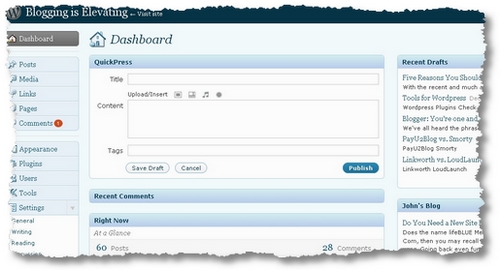
The dashboard area is divided into three areas: the sidebar on the left where each of the menu items can be opened and closed; the central column which includes the stats box, the writing box; and the right column that pretty much includes everything else. As you can see from mine, it’s easy enough to pick things up and move them around a lot. Clicking on the words “screen options” highlights an area where you can turn off things you don’t want to see.
The right sidebar includes several new designations which may be confusing to new users. First the ‘pages’ button has moved to just below ‘links’. It used to be located right next to ‘posts’. This confuses me now. I often hover between writing posts and pages, and now I have to look further afield to find the pages button. It seems illogical to place it after ‘links’.
The old ‘design’ menu has been renamed ‘appearance’ on 2.7 but functions in pretty much the same way as the its predecessor. The Tools menu, however, is a new one and features several items that were moved from the former ‘Manage’ menu, including import/export functions. The Upgrade items, though, hint at some of the new features of Wordpress that make management much easier (more later).
2. Keeping Upgraded – it’s getting easier!
Plugins are getting easier to manage: You will soon no longer need to use FTP to upload stuff – plugins and core upgrades can all be done within Wordpress itself. This leaves ‘themes’ as the only item that now needs FTP. I imagine that future versions of this will remedy this. Other software, such as Joomla or SMF, have long had this ability. Right now, you can upgrade a plugin in much the same way as uploading other items. Find the item ‘plugins’ on the left hand menu. Click it, and you will see it open slowly to reveal four options. To add a new plugin, click on the words ‘add new’, and you will be taken to a page where you can upload a zip file of the plugin which is uploaded and installed. After it’s done, you can activate it straight away. A nice touch. Just hit ‘install now’ to upload the plugin!

It’s also much easier now to find new plugins. Take a look at the next screenshot: you will see what I mean! The tags below the upload button hint at the next page. These plugins are from Wordpress.org’s own plugin area, and clicking on the tags reveals that they can all be downloaded and installed quickly and without any fuss.

In fact, activating and inactivating plugins has also got easier as has removing unwanted plugins. Simply just click on the plugins area on the sidebar, usually under ‘plugins’ >>> ‘installed’ menu option. You’ll find it easy to manage plugins from there, including removing them completely!
But this plugin management hints at another feature (one that I have not needed to try yet)… upgrading WordPress can now be done entirely from WITHIN the admin panel. Take a look for yourself! Under Tools >>> Upgrade, you’ll see the following dialogue.
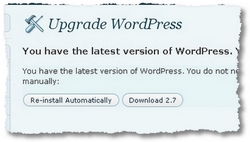
Very tempting when you can choose to download and reinstall automatically. I have no idea how this works, yet. But it would be a neat variation IF you could upgrade from WITHIN the admin area. Perhaps this is just teasing us.
3. Commenting from WITHIN Wordpress
Admins often had to comment in a very odd fashion before: read the comment in the comments area; find the post in the archive, read the post, and then comment in the comment box AFTER the end of the article. Now it’s much easier:

Just hit ‘reply’ to answer the query and a simple but functional comment box will appear just below, enabling you to answer without messing around in the archives! Of course, this presumes that you remember what you wrote!
4. Quick Posting and Quick Editing
The commenting function also has another feature that hints at much more power: the quick edit button. Clicking on the Quick Edit enables you to edit the comment very quickly, without calling up the entire post or page where it is entered. But the ‘quick’ idea has been extended with in several ways: making a powerful trio of blogging tools.
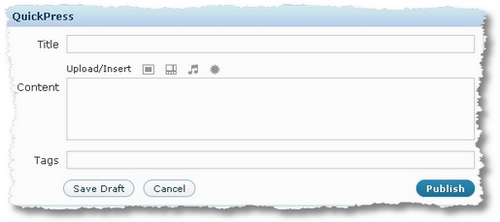
QuickPress : on the admin page, when you login you’ll be taken to a dialog box that enables you to write a short post, with media and tags and publish it in a matter of minutes! While you don’t have a WYSIWYG editor, you can learn some simple codes to faciliate quick blogging (they’re all available in the Write Post area).
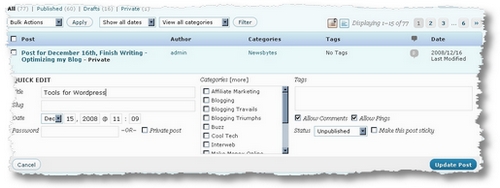
Quick Edit is also enabled in the post and page view, and allows you to quickly update a number of features (the usual suspects that a busy blogger will forget in the heat of the moment!): such as tags, categories, slug, date or more…
This combined with Press Links (shouldn’t it be called ‘Quick’ Links?) means that posting, editing, linking and commenting can all be carried out fairly rapidly.
5. You can now add media without creating post
This is another puzzle from the previous version that was finally finished! For years, I never thought about uploading media to Wordpress. I simply created a post and added the stuff I wanted… until last month when I created a batch of videos and wanted to upload them all at once. I would have had to create a post and add each one one by tedious one! Now it seems, I can simply upload media as I need and when I’m ready I can create a post and find the media I already uploaded! It’s funny, but that’s something you don’t need, until you really need it! And now it’s here!
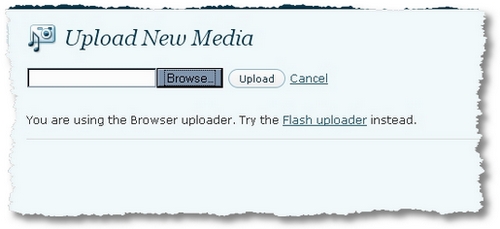
Now it would be nice if I could upload a number of files at one go! Oh, wait! It does! Or at least I think it does! I’m practising uploading media now! Now I wonder how I can create a simple gallery from these files! …
