Google Docs Tip: Including Published Spreadsheets

I have published several Google Documents on my Google Account but couldn’t figure out how to publish them ON MY BLOG. Well, there is an easy way to do this, it is an <iframe>. It works simply.

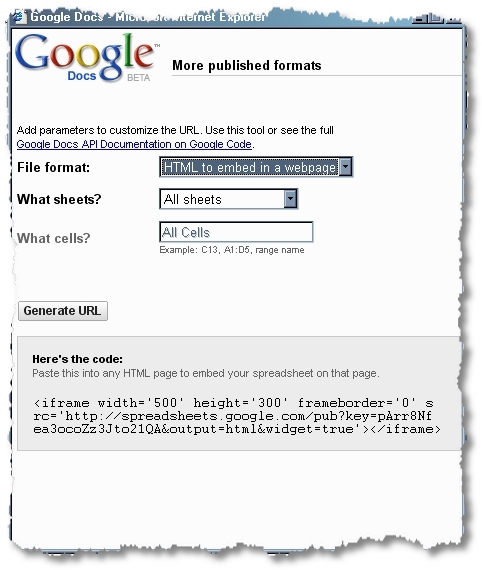
Remember to add the width=’x’ and height=’x’ and frameborder= ‘x’ where x is a number of pixels. I usually use a standard 500px width for this blog. The code is shown in the jpeg below.

You can also obtain the code for sharing a document within your blog. In fact, you can look at some stats for Taiwan in September 2008 that I made available because it was stuck in an Excel worksheet.

google docs

Here’s the sample document inserted for you. Enjoy!

When buying digital cameras, don’t skimp on the price!

I’ve been the owner of three different models of digital camera over the years. My first camera was a disaster: the pictures were fuzzy and low quality. In fact, the only way to get decent pictures was to resize them to a very small size. In fact, the photographs are actually quite reminiscent of photographs taken by an older cell phone camera!

If you’re looking to enlarge your photos for your LCD TV or other multimedia, you would be sorely disappointed by the quality. Perhaps it’s best that I forgot which brand that camera was… And this is based on my own personal experience…

Sample 1: OEM Unbranded Model

The *unnamed* camera produced pictures that were at best barely acceptable even in broad daylight. Anything else resulted in grainy images that were seriously blurred. Take a look. The picture looks okay when reduced to a small size, but as soon as you enlarge it, you see ALL the problems. It cost nearly US$100 to buy at the time, and was a total waste of money. I regretted buying it and it is still sitting in a drawer somewhere.

sample

(Taken inside at a school demo lesson with Tommy).

Sample 2: Kodak Camera C360

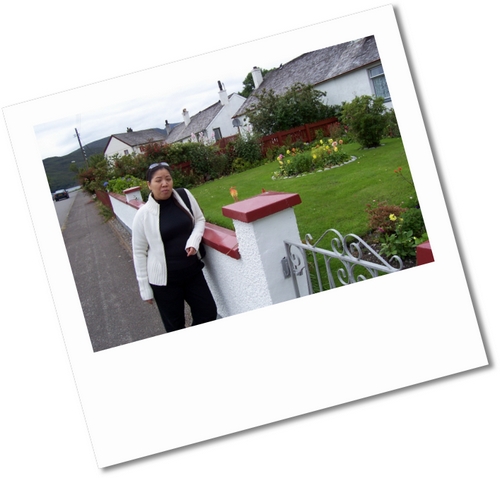
My second camera was a Kodak Camera C360 which took great pictures for my budget, and was perfect for blogging. The other positive factor was that I could just use ‘AA’ batteries (if the rechargeable died) in an emergency. Very handy to drop into 7-Eleven and buy some at a pinch. But it still didn’t give great shots for high definition purposes. This camera was purchased for a trip to the UK in 2005, and was a very successful choice.

The Kodak Camera produced much better resolution photographs with its 5mp capabilities, though there was some softness and chromatic aberration in some areas. But it produced great color images that were attractive. And it was a highly versatile little camera. Unfortunately, I also bought a new Kodak when I replaced it, but the replacement was just not as good.
100 0141

Taken in 2005 at Ullapool in Scotland.

After losing my Kodak, I quickly purchased my third and most recent camera, the Panasonic Lumix DMC series FX-30 model which has several really neat features including a 28mm lens. This makes a wider angle and far more landscape style – which is great for the scenery of Taiwan.

Sample 3: The Panasonic LUMIX DMC-FX30

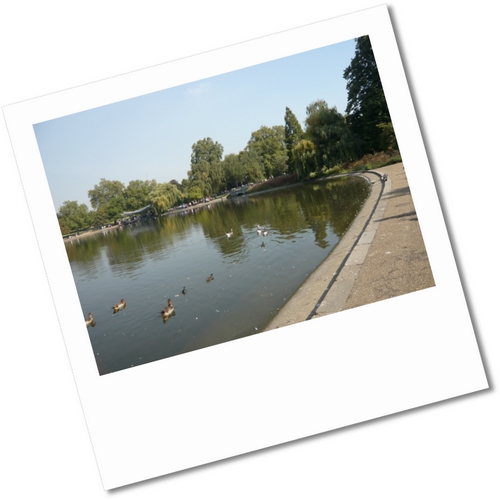
This camera is much better than either of the first two, with its 7.2mp, multiple shot modes, and high resolution modes. I’ve been very happy with this camera choice for its ability to take great landscape shots as well as decent portraits. These photographs are perhaps the best for enlarging for digital TVs or enjoying at full screen size on your laptop computer. It doesn’t deal with haze well or night time shots… but otherwise it’s much better.
P1020414

Taken in 2008 at Hyde Park in early Autumn.

In fact, when I was in the UK, I was able to purchase a small laptop that I used to show my digi-photos to family and friends, in full size, of course. It was perfect way to set the screensaver or presentation mode, and let the photographs play in the background. I never figured out how to connect it to the TV, though. But as a portable solution, it was perfect.

I didn’t read any reviews of the cameras I bought… it’s probably not worth reading them for me, as I find it difficult to get the exact models here in Taiwan. Also, the models turn over so fast! So I finally decided to go with brand names I trusted. Also, I avoided buying the most ‘economical’ models after the first one. It just wasn’t worth the additional disappointment. I reluctantly bought a model with no replaceable batteries, but that hasn’t been much of a problem. But I’m not a professional photographer by any means! I only wish I was!
Need Video for your Blog: Turn your camera videos into FLVs for your blog, easily and quickly.

I’ve been doing video for a while, and always found it a pain to transcode videos. Why? I don’t have a Flip camera but I just use the movie mode available for the smaller cameras (my Lumix for example). Unfortunately, I’m not an Apple FanBoy, which makes dealing with those QT movies a really pain in the butt. I tried different solutions for transcoding those and had limited success.

Transcoding Hamlet!

But for a recent project, I need to transcode some FLVs of Hamlet lectures like this. This was a project for the Taiwan Science Council and the website was the result of a project application.

hamletintaiwan

I didn’t have any time editing the videos, though that would’ve been ideal. I only had a little time to transcode and upload the videos. The results are surprisingly effective. And that was all thanks to a program called MediaCoder:

MediaCoder is a free universal batch media transcoder, which nicely integrates most popular audio/video codecs and tools into an all-in-one solution. With a flexible and extendable architecture, new codecs and tools are added in constantly as well as supports for new devices. MediaCoder intends to be the swiss army knife for media transcoding in all time and at this moment, it already has millions of users from 170+ countries all over the planet.

I found that for the first time I was able to transcode video easily from Quick Time to FLV without an intermediate step. Previously I had to create an AVI format and then use Super to create an FLV file. After that, uploading was time consuming but effective! Voila!

make an FLV

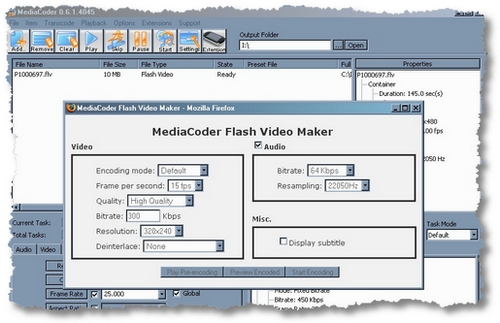
Simply drag the file to the transcoding area, then hit Extensions and “Other Devices” and Flash Video Maker. I set the quality as high as I dare which turned 1 hour of MPEG4 video into an FLV of about 150MBs. I also kept the audio as high quality as I could, given that it was a lecture, audio quality was more important than video quality. Other choices: 25fps, Hi-Quality, with 300Kbps bitrate and original resolution. Audio was default settings. The results are effective if a little grainy.

Adding Video to a Post

You can download one of the best plugins for adding Flash Video to your blog. It’s called Flash Video Player Plugin for WordPress and can be found at http://www.mac-dev.net/blog/index.php where you can download the latest version. Installation is easy: upload and activate.

To add a video to your post, you simply upload the file via FTP, then create a post and add the code as follows:

That’s it. Pretty easy, I think. I had some problems getting video to work on my other blog, but it was because of a plugin incompatibility! Once the offending plugin was turned off, it worked beautifully.

So if you have videos on your camera in unusable QT formats, download MediaCoder, transcode the files, and upload the FLVs to your blog. As an example, I’ve included my wife playing Jenga… and she loses, big time!

Enjoy!