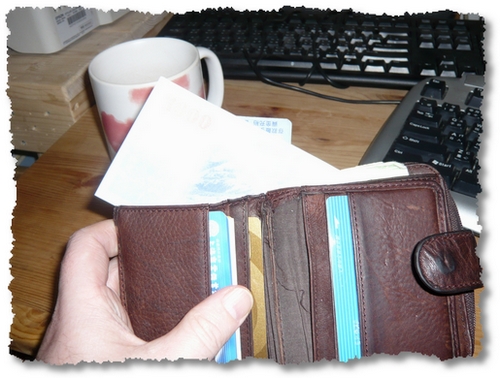
Keeping a track of expenses is truly a nightmare especially when you’re on vacation. You have all those little bits of paper, phone numbers, receipts, credit card receipts, cash, foreign coins, etc., etc. Soon you end up with a wallet that looks similar to this. If you’re anything like me, being organized is a real challenge. I do have folders and organisation, but there are times when the whole system seizes up! You know what I’m talking about if you take a look at this wallet of mine.
Things flopping out everywhere, terrible. Well, a blog I was reading suggested using Google Docs new forms feature to create an expense list. It’s a brilliant idea if you have a mobile device, or prefer to tally your expenses at the end of the day or like to do it at work (when the boss isn’t looking). So here goes: a step-by-step guide to setting it up.
You will need:
- a bunch of receipts to set it up;
- a Google Email account so you an access Google Docs;
- and a little patience!
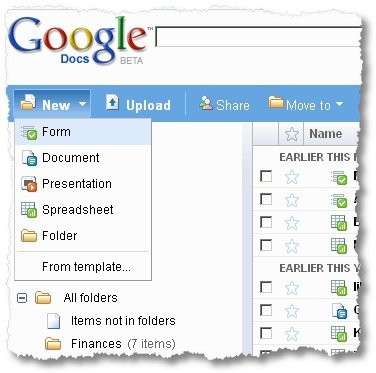
Step 1: Create a new form – look in the image to see how it’s done. Click on ‘new’, tab down to ‘form’ and release the click or click on it again.
Step 2: You will now see a screen with the form tabs and fields.
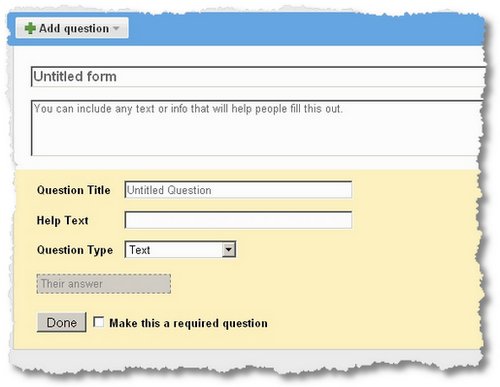
A field is the area of the form that you need to type some data. So, in the Untitled form, you can enter the Form Name. In the Question area, you can write: “What is this expense for?” or similar. If you need help text, enter something useful so you know what data to enter. Then choose the question type: “Text” is most straightforward at this point. Then click ‘done’ and ‘required’ (if need be).
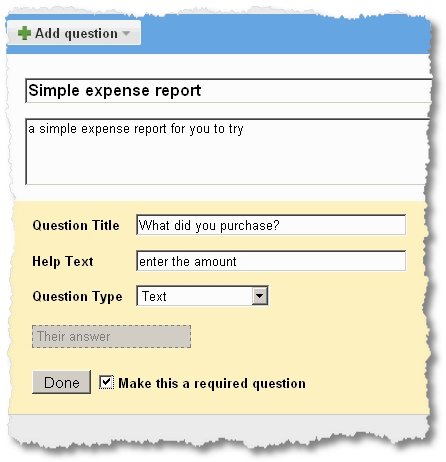
Step 3: To add a new field, press ‘Add Question’ and repeat as necessary. Repeat this for the date, the form of payment, and the amount.
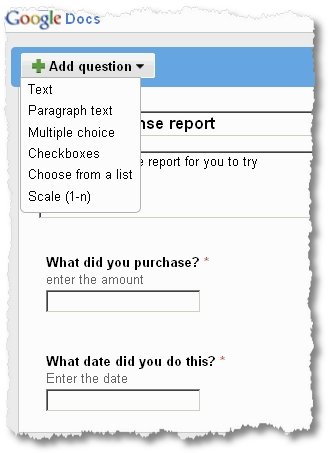
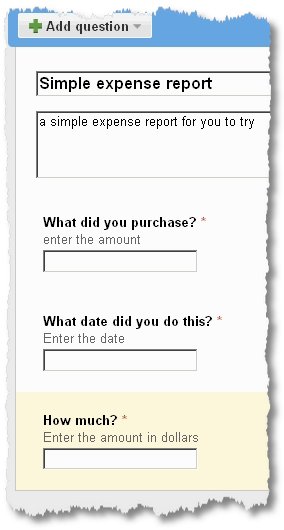
Step 4: I’ll show you my completed form which you can see for yourself.
That’s pretty much the form set up. Don’t forget to hit ‘save’ so you don’t lose the changes. You can click to see the form which I have published and you can try it out!
So what happens to the data? Well, let’s take a look. The data is auto-saved in the base spreadsheet for later. You go to your Google Docs again and you’ll see the new spreadsheet sitting there. I’ve entered several of my favorite ‘sins’ and you can see the result.
Each item is stamped with the entry time and the fields you required. You can then perform any calculations you like using traditional spreadsheet functions. You can then email the form, embed the form in your blog or online documents, or go back and edit the form as you wish.
I’ve set my form to be published and republished as data is entered. You can take a look at it yourself, just click on the image above. Please enter some items for purchase, and you’ll see it updated dynamically. Pretty simple, I’d say. No doubt, far more complicated than it looks, under the hood!
